


In today’s world of online learning, the value of a community cannot be overstated. While LearnDash excels at transforming your WordPress site into a powerful Learning Management System, it lacks one critical feature: community-building tools.
But what if you could easily integrate a vibrant, engaging community around your courses, without the complexity or high costs of other platforms?
Enter Fluent Community—a solution that’s simple to set up, cost-effective, and designed to enhance collaboration, support, and networking for your learners.
In this article, we’ll explore why Fluent Community could be the perfect partner for your LearnDash courses, helping you create a thriving space where students not only learn but connect, grow, and succeed.
What’s LearnDash & Community?
LearnDash is a WordPress plugin that transforms your website into a robust Learning Management System (LMS). It enables educators to create and sell online courses globally without technical expertise. With a simple installation process, educators can quickly set up courses without needing programming skills.
While LearnDash simplifies course creation with its user-friendly interface, one notable gap is the lack of built-in community-building features. This raises the question: why is a community essential for an online course?
To answer this, it’s important to recognize the value of teamwork and networking. These skills are critical for success, both during education and throughout one’s career. Even traditional institutions emphasize the importance of learning communities, as they foster knowledge sharing, enhance understanding, and motivate students to stay engaged.
Here’s why incorporating a community into your LearnDash courses can elevate the learning experience:
Encourages Networking
Students often enroll in online courses for self-paced learning. However, post-graduation success depends on more than just knowledge—it requires connections. Research shows that many job opportunities arise from internal referrals and professional networks.
By providing a platform for interaction, you enable learners to build valuable networks. These connections can lead to recommendations, collaborations, and career opportunities, solving a key challenge: ensuring learners are equipped for real-world success.
Provides Support Systems
Learning often involves doubts and challenges. Without a community, students may struggle to find answers, leading to frustration and stagnation.
A well-designed community allows learners to discuss topics, seek help, and share knowledge. This peer-to-peer support system not only clarifies doubts but also fosters confidence and a sense of belonging, ensuring no one feels left behind.
Enhances Collaboration
Communities encourage collaboration, making learning more engaging and interactive. Group projects and discussions help students develop teamwork skills—an essential trait sought by employers. Through collaboration, students learn to work effectively with others, preparing them for professional environments.
By integrating community features into your LearnDash courses, you not only enhance the learning experience but also equip your students with essential skills for their future. A community fosters networking, provides vital support, and promotes collaboration, making online learning more impactful and rewarding.
Why an Online Community Matters for Your Website
Building an online community is no longer just an option—it’s essential. Communities drive collaboration, foster engagement, and cultivate long-term loyalty. Whether managing an online course, a membership site, or an e-commerce platform, an engaged community can become one of your brand’s most valuable assets.
However, creating and maintaining an online community comes with its challenges. Common pain points include:
- Complexity: Managing a community platform can be technically overwhelming for beginners.
- Cost: Many solutions come with steep pricing that might not fit smaller budgets.
- Scalability: As your community grows, your platform needs to handle increased traffic without compromising performance.
This is where the choice of the right tool becomes critical. Fluent Community aims to address these challenges by offering an easy-to-use, scalable, and cost-effective solution. But how does it compare to other popular options like BuddyBoss? Let’s dive deeper.
Introduction to Fluent Community
Fluent Community is a powerful WordPress plugin designed to create fully functional online communities and social networks. Developed by WP Manage Ninja, it is a feature-rich yet lightweight solution that integrates seamlessly into WordPress sites. Fluent Community stands out as an all-in-one platform that combines flexibility, user-friendliness, and performance, making it an excellent choice for building collaborative environments such as membership platforms, student communities, or interest-based groups.
Unlike many traditional community-building tools, Fluent Community eliminates the need for external services or coding expertise. It enables site administrators to create activity feeds, manage private messaging, display gamified leaderboards, and allow members to interact through customizable profiles. Additionally, its compatibility with LMS platforms ensures a smooth user experience for educational communities, making it especially suitable for course creators and e-learning platforms.
Whether you’re looking to foster networking, encourage collaboration, or enhance engagement, Fluent Community provides a cost-effective and efficient alternative to bulky platforms like BuddyBoss or expensive subscription-based services like Circle. With its intuitive setup and robust support team, Fluent Community offers a seamless experience for both administrators and users, empowering website owners to grow thriving online communities.
Key Features of Fluent Community
Activity Feeds with Light and Dark Modes
Members can interact in real-time through activity feeds, creating dynamic engagement. Both light and dark mode options cater to user preferences, enhancing usability.
Private Messaging System
Facilitates direct communication between users, allowing them to connect privately within the community, fostering deeper interactions and collaboration.
Customizable Member Profiles
Members can personalize their profiles, showcasing their identity and activity within the community. This feature enhances user connection and engagement.
Gamified Leaderboards
Leaderboards incentivize active participation by recognizing top contributors, making the community experience more interactive and rewarding.
Lightweight and Performance-Optimized
Fluent Community is built with a clean, lightweight codebase that ensures your website maintains optimal speed and performance, even with active community engagement.
These features make Fluent Community a powerful and user-friendly solution for creating vibrant online communities directly on WordPress.
Setting Up Fluent Community: A Step-by-Step Guide
Fluent Community offers a straightforward setup process, even for users new to WordPress. Follow this guide to integrate Fluent Community into your site and enhance your LearnDash courses with community-driven engagement.
Step 1: Install and Activate Fluent Community
- Log in to your WordPress dashboard.
- Navigate to Plugins > Add New.
- Search for Fluent Community.
- Click Install Now and then Activate once the installation completes.
Step 2: Configure Basic Settings
Getting Started with Fluent Community Dashboard
Once you install Fluent Community, the first thing you’ll notice is its user-friendly dashboard. Navigate to the Fluent Community section in your WordPress admin panel, where you’ll see several key options to manage and set up your community portal. Here’s what each section of the dashboard offers:
- Go to the Portal: A quick link to access your community portal and start exploring the interface.
- Portal Settings: Configure the basic settings of your portal, including titles, descriptions, and other foundational options.
- Customization: Personalize your portal’s user interface by adjusting colors, branding, and layout settings.
- Advanced Features: Manage advanced settings and addons to enhance your portal’s functionality.
- Documentation: Access a knowledge base to learn more about Fluent Community and its features.
- Change Community URL: Easily modify your portal’s URL to suit your organization’s preferences.
Now that you’re familiar with the Fluent Community dashboard, let’s dive into configuring the essential settings.
1. Portal Settings: General
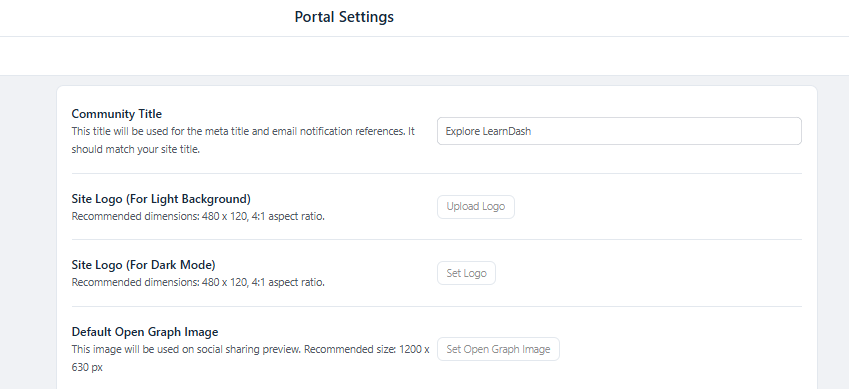
- Community Title:
- Use a title that reflects your course community, e.g., “Explore LearnDash.”
- This ensures a cohesive branding experience for learners.
- Site Logo:
- Upload logos that match your course branding for light and dark modes. This creates a seamless transition between your LearnDash course pages and community portal.
- Default Open Graph Image:
- Set a relevant course banner or promotional image as the Open Graph image. This will display correctly when learners share community links.
2. Portal Access Settings
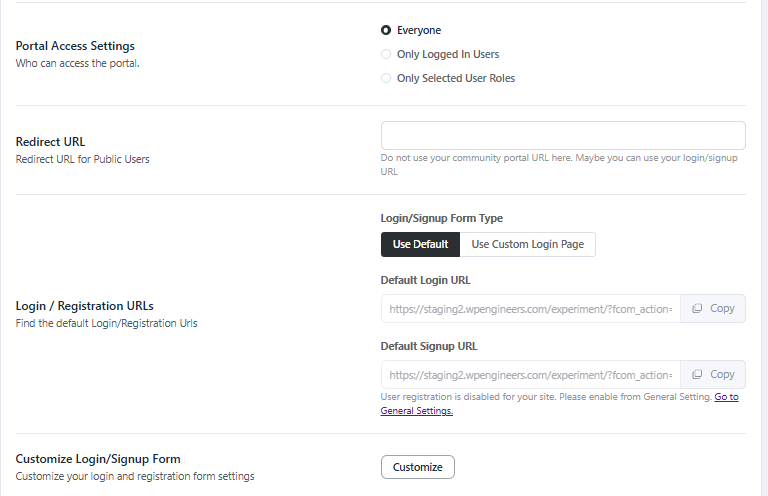
- Who Can Access the Portal:
- Restrict portal access to enrolled LearnDash students or specific roles like “Subscribers” or “Group Leaders.” This ensures only course participants can join the community.
- Redirect URL:
- Configure the redirect URL to guide non-enrolled visitors to a LearnDash course signup or landing page.
- Login/Signup Form:
- Use customized login and registration forms to provide a streamlined onboarding process for course participants joining the community.
3. Features & Addons
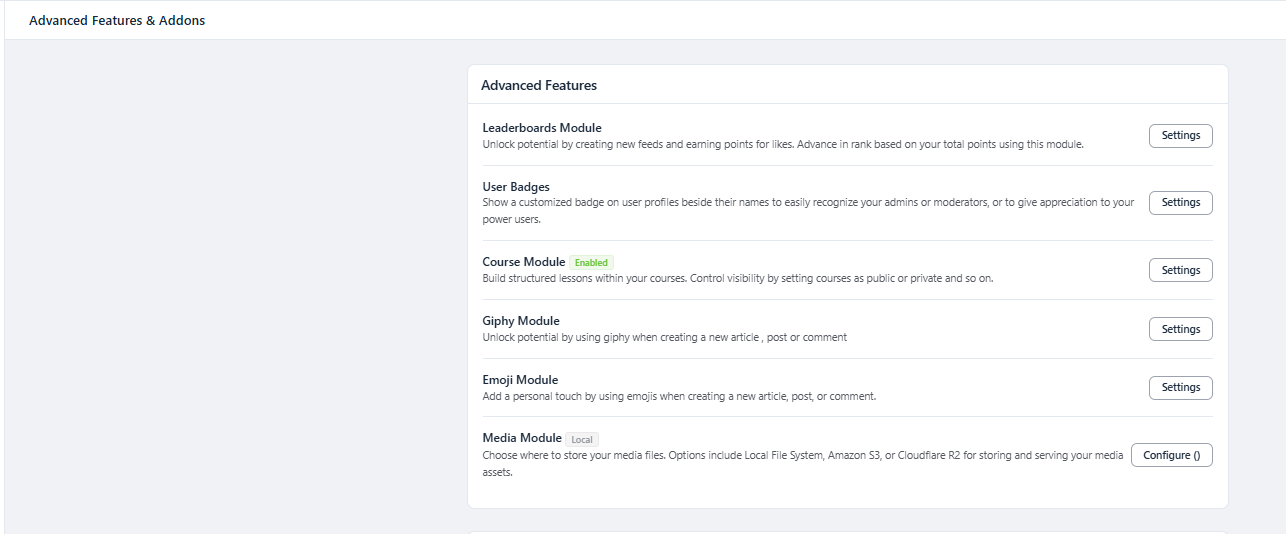
- Leaderboards Module:
- Enable leaderboards to gamify your course experience. Assign points for course completions, quiz scores, or discussion participation.
- User Badges:
- Award badges for course milestones like completing a module or passing a quiz. This boosts motivation and engagement.
- Giphy and Emoji Modules:
- Enable these to make course discussions more interactive and fun, especially in forums or post comments.
- Media Module:
- If your LearnDash courses involve user-generated content (e.g., uploading assignments), configure media storage (local or cloud options like Amazon S3).
4. Customizations
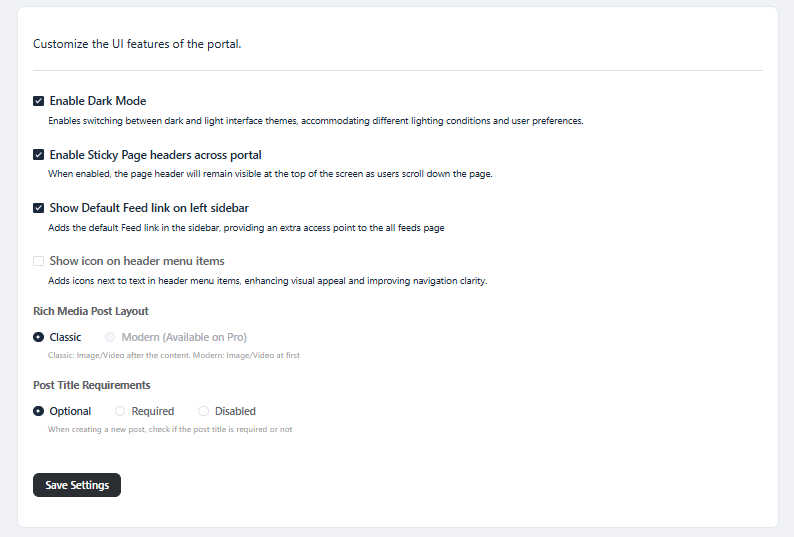
- Interface Theme (Dark/Light Mode):
- Offer dark/light mode options to enhance accessibility and user comfort during long study sessions.
- Post Layout for Course Discussions:
- Use the Modern layout for course announcements and discussions, making media files like images or videos prominent.
5. Email Settings
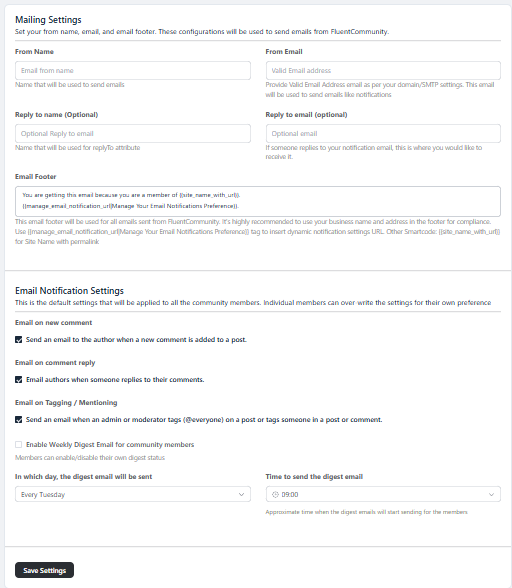
- From Name and Email:
- Set the email name and address to match your course branding, ensuring students recognize official communications.
- Email Notifications:
- Enable notifications for course-related updates, such as:
- New comments or replies in the course community.
- Mentions or tags related to course discussions.
- Weekly digests summarizing community activity.
- Enable notifications for course-related updates, such as:
6. Privacy Settings
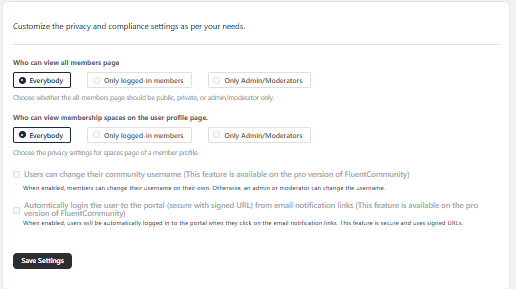
- Access to All-Members Page:
- Restrict visibility of the members’ page to enrolled students, maintaining privacy and exclusivity.
- Membership Spaces on Profiles:
- Limit visibility of spaces to participants within the same LearnDash course group.
- Automatic Login via Email Links:
- Enable this setting to provide seamless access for students clicking community links from LearnDash course notifications.
Step 3: Create a Group for Your Course and Set Up a Space
- Create a Group:
- From your WordPress Dashboard, navigate to Fluent Community > Portal Settings > Space Groups.
- Click on the “Create New Group” button.
- Enter the Group Name, which should reflect the course or community it represents (e.g., “Digital Marketing Strategies”).
- Add a brief Group Description to explain its purpose or target audience.
- Set Up a Discussion Space:
- Head to your Fluent Dashboard and click on “Go to Portal” to access your feed.
- From the right sidebar, navigate to Group Feed and click the “+” icon to add a new space.
- A popup titled “Choose a Space Type” will appear. Select “Discussion Space” and click Next.
- Configure the Space:
- Provide the required details:
- Space Title: Use a title relevant to the group (e.g., “Digital Marketing Discussion Forum”).
- Slug (optional): Create a short, unique identifier for the space (e.g., “marketing-discussions”).
- Description: Add a brief explanation of the space’s purpose (e.g., “A space to share ideas, ask questions, and collaborate on digital marketing strategies.”).
- Set the Privacy Settings to determine who can access the space (e.g., Private for exclusive access).
- Configure the Lock Screen Type (choose between a custom lock screen or the default lock screen).
- Enable the checkbox for “Allow users to request to join this space” for easy member management.
- Assign the space to a Menu Group (e.g., Digital Marketing Strategies).
- Define Who can view space members (e.g., Members Only).
- Click Continue to finalize the setup.
- Provide the required details:
By completing this step, you will have successfully created a group and an engaging discussion space for your course participants. These tools will help foster a collaborative environment where members can interact, discuss ideas, and share feedback effectively.
Note: Repeat this process for each course to create dedicated discussion spaces.
Step 4: Link LearnDash Courses with Groups
1. Access the LearnDash Course Editor
- Go to your WordPress Dashboard.
- Navigate to LearnDash LMS > Courses.
- Select the course you want to link to a Fluent Community group by clicking Edit.
2. Create a Button or Link for the Group
Option 1: Add a Button via Gutenberg Editor (Default Editor)
- In the LearnDash course editor, find the section where you want to place the link to the Fluent Community group (e.g., near the course description).
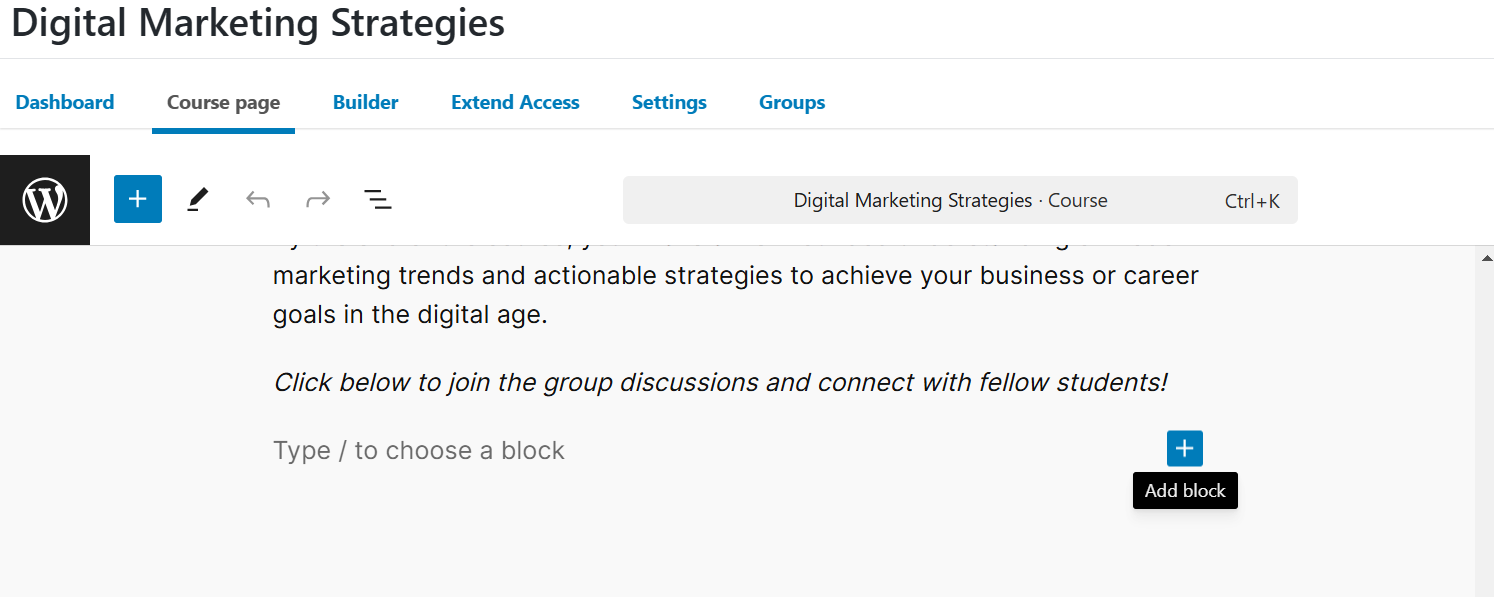
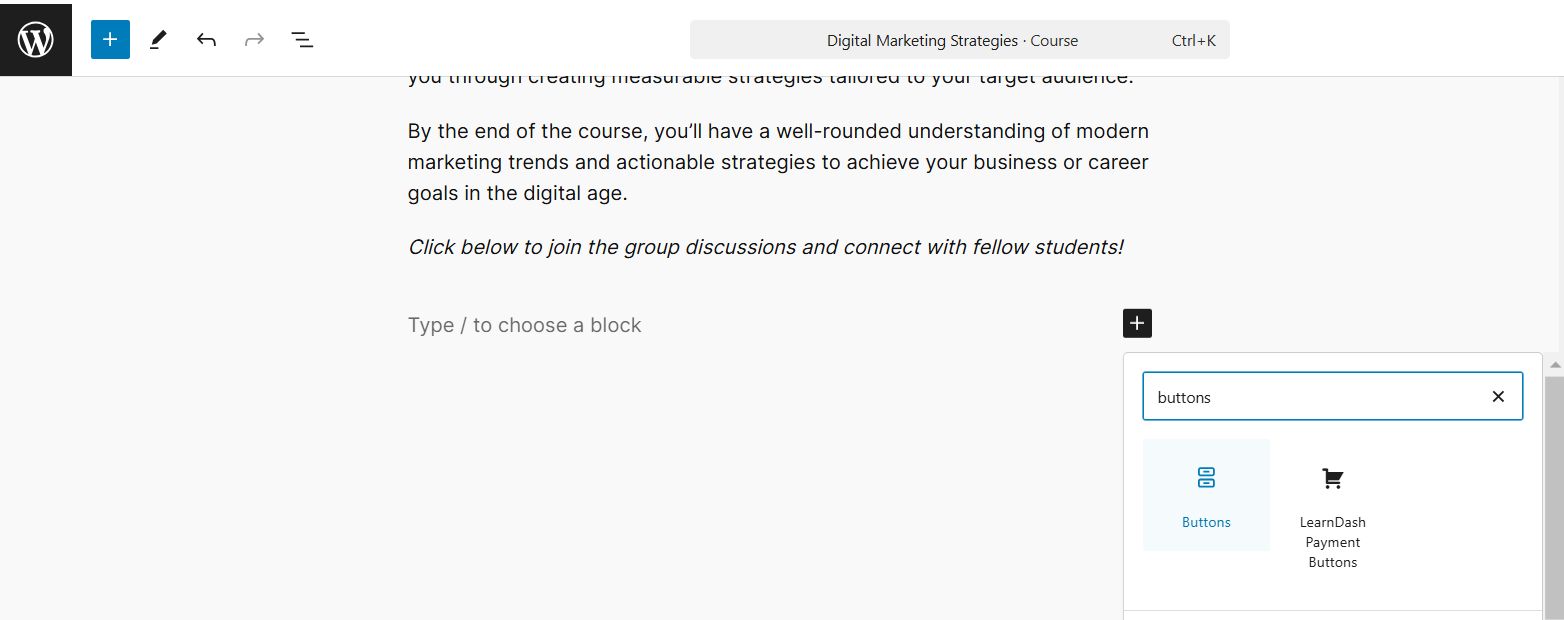
- Click the + (Add Block) button and select the Button block.
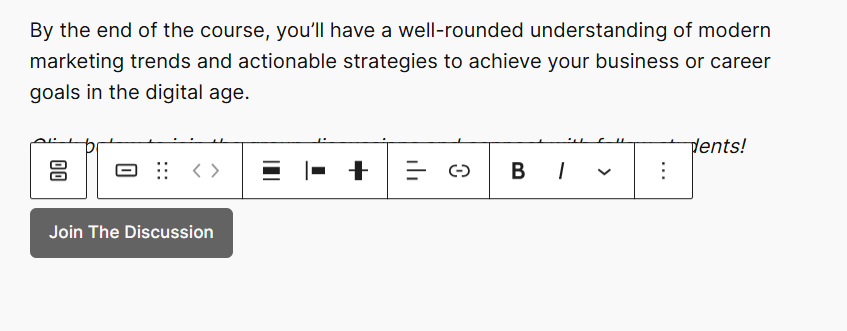
- Enter the button text, e.g., Join the Discussion or Visit Group Space.
- Paste the group URL you created during Step 3 into the button’s link field.
- Adjust the button’s alignment and style if needed using the settings panel.
Option 2: Add a Widget or Link via a Page Builder (Optional)
If you’re using a page builder like Elementor or WPBakery:
- Drag and drop a button widget to the desired section of the course page.
- Label the button (e.g., Join Group).
- Paste the Fluent Community group URL into the button’s Link field.
3. Adjust the Button Placement for Visibility
For better visibility and engagement, ensure the button is prominently displayed. Suggested locations:
- Below the course description.
- Near the lesson or module list.
- At the top of the course page for easy access.
4. Save and Publish Changes
- After adding the button, click Update to save your changes.
- Visit the course page on the front end to verify that the button or link is visible and redirects to the correct Fluent Community group.
5. Additional Tips
- Styling the Button: Use your theme’s options or custom CSS to style the button so it matches your course branding.
- Mobile-Friendly Design: Check the button’s placement on both desktop and mobile views to ensure it is accessible for all users.
- Add Instructions (Optional): Include a short note near the button, such as:
“Click here to join the group discussions and connect with fellow students!”
Step 5: Customize and Test Your Community
- Test the integration by enrolling in a course and clicking the discussion button.
- Interact with the group to ensure proper functionality, including posting updates, sending messages, and viewing leaderboards.
- Adjust settings or designs based on user feedback.
Why Fluent Community Is Faster to Set Up Than BuddyBoss
- Simplified Installation: Fluent Community is lightweight, with fewer dependencies, leading to quicker installation and activation compared to BuddyBoss.
- Straightforward Configuration: BuddyBoss often requires extensive setup and customization, while Fluent Community provides pre-built templates and intuitive defaults.
- Cost-Effectiveness: Unlike BuddyBoss, which has premium subscription tiers, Fluent Community offers a one-time payment, making it more affordable in the long run.
By following these steps, you’ll have a fully operational community integrated with your LearnDash courses in no time, enhancing student engagement and collaboration.
Comparison: Fluent Community vs. BuddyBoss
Fluent Community and BuddyBoss are both popular platforms for building online communities, but they cater to different needs and budgets. Here’s a streamlined comparison of their key differences.
| Feature | Fluent Community | BuddyBoss |
| Ease of Use | Simple, beginner-friendly interface | More complex, with a steeper learning curve |
| Pricing | Free core version; affordable premium add-ons | Starts at $228/year, with additional costs for premium features |
| Feature Set | Basic community tools (activity feeds, member directories) | Advanced features, including gamification, social interactions, and integrations with LMS (LearnDash, WooCommerce) |
| Customization | Limited customization options | Highly customizable with deep control over user profiles and community settings |
| Scalability | Best for small to medium-sized communities | Built for large-scale communities with extensive needs |
| User Experience | Clean and simple for smaller communities | Rich user experience with activity feeds, private messaging, and mobile optimization |
| Performance | Lightweight design for better performance with fewer resources | Feature-rich, but can be resource-intensive with complex setups |
| Support & Documentation | Good community-based support | Excellent support with 24/7 customer service and detailed documentation |
Key Insights:
- Ease of Use: Fluent Community offers an intuitive setup for beginners, making it an excellent choice for those with limited technical skills. In contrast, BuddyBoss, while more feature-rich, comes with a steeper learning curve that may require more time and resources to master.
- Pricing: Fluent Community’s free version is a major advantage for smaller projects, with the option to scale up through affordable premium add-ons. BuddyBoss, while offering extensive features, comes with a subscription model that may be more suitable for larger businesses or organizations.
- Feature Set: If you’re looking for a simple community setup, Fluent Community provides essential tools. However, for a more comprehensive experience with advanced customization, integrations, and social interactions, BuddyBoss stands out.
- Customization: BuddyBoss offers unmatched customization options, allowing for a fully tailored community experience. Fluent Community, on the other hand, is more streamlined and easier to set up but with fewer options for deep customization.
- Scalability: For larger communities or businesses that need mobile apps, gamification, or extensive integrations, BuddyBoss is the better choice. Fluent Community works best for small to medium-sized communities where simplicity is key.
Why Fluent Community Might Be the Better Choice
Fluent Community presents several advantages that may make it a better option than BuddyBoss, depending on your needs. Here are some of the key reasons why it might be the ideal solution for certain scenarios:
- Affordability: Fluent Community offers a free core version with additional paid features, making it a cost-effective option for those on a smaller budget. In contrast, BuddyBoss requires an annual subscription, which may be more expensive, especially if you only need basic community functionality.
- Ease of Setup: Fluent Community is easy to install and set up, even for those without technical experience. With minimal configuration, you can start building your online community around your LearnDash courses. This is ideal for small course creators or those who prefer a quicker, more straightforward setup.
- Simplicity: Fluent Community is focused on providing essential features for community building, such as activity feeds, member directories, and basic social interaction tools. For course creators who want to integrate their LearnDash courses with a simple community space without the complexity of advanced features, Fluent Community offers a streamlined approach.
- Small to Medium-Sized Communities: Fluent Community excels when you need a solution for smaller communities, especially when budget, ease of use, and fast implementation are the priorities. If you’re just starting out with LearnDash or have a smaller audience, Fluent Community is a strong contender without the need for a heavy investment in additional features.
Transform Your LearnDash Course into a Thriving Community with TeknoFlair
If you’re looking to build a dynamic, engaging online community for your LearnDash courses, TeknoFlair is here to simplify the process. Our team specializes in creating custom, user-friendly community solutions that integrate seamlessly with LearnDash, enabling you to enhance learner interaction, boost engagement, and foster collaboration—without needing any coding experience.
At TeknoFlair, we understand the importance of creating a space where learners can interact, discuss, and grow together. Whether you choose Fluent Community or BuddyBoss, we provide tailored solutions that make it easy to build course-specific groups, discussion forums, and real-time interactions. This fosters a collaborative environment that keeps your students motivated and connected to the course content.
What We Offer:
- Custom Community Solutions: From creating and managing community groups to enabling course-specific discussions, TeknoFlair ensures your learners are engaged and supported.
- LearnDash Integration: Seamlessly integrate community features with your LearnDash courses, so learners can interact and collaborate within their course context.
- User-Friendly Setup: You don’t need technical expertise to create a thriving online learning community. We handle the integration, so you can focus on teaching and content creation.
- Ongoing Support: TeknoFlair is with you every step of the way, offering guidance and support as your community grows and evolves.
Contact us today to discuss how we can create a customized, engaging community experience for your LearnDash courses and help your students build stronger connections with each other and the course material.
Closing Thoughts: Choosing the Right Tool for Your Needs
When it comes to choosing the right platform for building an online community around your LearnDash courses, it’s important to consider your unique requirements. Fluent Community and BuddyBoss both offer robust solutions, but they cater to different needs.
- Fluent Community is a great choice if you’re on a smaller budget, need a simple, fast setup, and are focused on a streamlined community experience. It’s ideal for course creators who want to offer essential community features without the complexity and costs associated with more advanced platforms.
- BuddyBoss, on the other hand, is a better fit for larger-scale communities, advanced customization, and businesses that need more robust features like gamification, private messaging, and mobile apps. If you anticipate growing your course offerings and community over time, and have the budget and technical resources, BuddyBoss might be the better choice.
Ultimately, the decision depends on the scale of your community, your budget, and how much time you’re willing to invest in setting up and managing the platform. Fluent Community offers a solid foundation for smaller communities, while BuddyBoss provides a comprehensive and scalable solution for more complex needs.
By understanding your specific needs, you can make an informed decision about which platform will best support your LearnDash courses and community goals.
FAQs
How do I customize my FluentCommunity space to match my brand?
FluentCommunity offers advanced customization options to make your platform feel like an extension of your brand. You can modify elements such as logos, fonts, colors, and even choose between light and dark modes to enhance user experience. You can also personalize the customer dashboard and include custom sidebars to streamline navigation. This ensures that your community space reflects your unique identity and meets the needs of your users.
Can FluentCommunity handle different membership tiers for my users?
Yes, FluentCommunity allows you to create flexible membership plans, which means you can offer different access levels based on user preferences. Whether you want to provide premium access to certain resources or create an exclusive learning environment, this feature ensures that members can enjoy a personalized experience tailored to their needs.
What tools can I integrate with FluentCommunity for a better experience?
FluentCommunity integrates seamlessly with popular tools like FluentCRM for email marketing, Fluent Forms for building forms, and Fluent Support for customer support. These integrations enhance your ability to manage community interactions, automate tasks, and provide seamless support to your members.
How does FluentCommunity ensure privacy and secure data management?
FluentCommunity prioritizes the privacy and security of your community. With customizable privacy settings, administrators can control access to different spaces or content. The platform also provides an approval system to moderate posts, ensuring that all content meets quality standards before being shared. This gives you complete control over the flow of information within your community.