Do you know how to set up a Canva Design certificate in LearnDash?
Certificates are the essence of every LearnDash course. It not just matters for a student to have a certificate after finishing a course but it’s equally important for you as a course creator, for several reasons.
We will explore the reasons why you should have a Canva design certificate in your LearnDash and the way to set-it up.
However, the most important reason that I believe should encourage you to design a Canva certificate and set-it up on your LearnDash course is brand identity.
While many course creators opt for generic certificates, customizing your Canva design will help you stand out, reinforce your brand, and build student trust.
But then how would you stand-out in the market as a brand?
With a bit of customization and efforts in designing your certificate, you can stand out. This one-time effort will not only represent your brand’s identity but instill confidence among the students for your course.
Now, let’s dive into why Canva-designed certificates are essentials and how to create one for your LearnDash course.
Know more about LearnDash features here.
Why Is a Canva-Design Certificate Important?

Before you begin reading out this article, I would like you to visit Google Images for once and search for “certificates”.
Let us know what you find there in the comments below.
For a professional course creator like us, I see an ocean of certificates having the same usual designs. Yet, many decide to choose one of these templates to create a certificate for their courses.
I mean, you’ve invested so much in terms of time and money to create a unique course that really makes a difference, right?
Then why choosing a random template or a simple certificate maker plugin is the ready-to-go option for you?
Thus, having a well-designed certificate provides much more personalization that generic templates can’t even match. Here are 3 prime reasons why you should go for a Canva-Based designed certificate:
Establishing Brand Identity
If you’re a course creator with a mind to expand your course selling brand, it’s important for you to understand what makes-up a brand identity for your course.
Since you’re not alone in the market and there are dozens of brands selling the same course that you’re working on, it can get really competitive.
But what can stand you apart from this competition?
Well, simply put, a unique brand identity.
It not only helps you create a recognizable brand but also supports you in selling your courses as students will prefer a course from a brand having online reputation.
Enhancing Student Motivation
Another reason to design a certificate through Canva for your LearnDash course is that a customized certificate can enhance student motivation.
It’s because when a student enrolls into a course, there are many chances for leaving the course without even completing it.
This happens for various reasons, one of the main reasons for this behavior could be lost interest due to a reward which isn’t deemed valuable.
Thus, when you offer a unique certificate, it can be an adrenaline booster for a student to complete the course to receive the certificate for showcasing it on the social media platforms for gaining a competitive edge.
Building Trust and Credibility
Building trust and credibility among the students in a market filled with competition is not easy as it might seem to you.
You will have to face giants of the industry offering the same courses and the newbies who have just started their course selling career.
Both can have a major impact on your course selling journey, so, to avoid getting crushed by giants and losing your course into the blackhole of newbies, it’s important to stand-out.
Offering a Canva-design certificate can help you do it, it will build trust among students with regards to your course as a customized certificate reflects the hard-work of the course creator in ensuring that the course has a value.
When the value is realized by the student it instills credibility and can boost your course sales.
These 3 are the major reasons why you should invest in a canva-designed certificate for your LearnDash course. If you have gotten bored with so much theory and waiting for the actionable stage, you’re in time.
Let’s explore how to create a canva-design certificate and integrate it with your LearnDash course.
So, tighten your seatbelts as this article is starting to get more technical.
Creating a Certificate in Canva
Creating a certificate in Canva is not difficult and is recommended for those who have little or no knowledge of graphic designing.
However, if you have the budget to hire a graphic designer for this task, it would be much preferred since creating a template from scratch with Photoshop or any other graphic designing tool is more preferred, right?
But that doesn’t mean that you should lose your hopes, as with the help of Canva you can create an amazing template for your LearnDash course certificate.
Let’s get into the steps of how to make it happen.
Step#1 Setting Up a Canva Account
If you don’t have a Canva account, create a new account. To do it follow these steps:
- Go to Canva.com
- On the home-page, you will see the option of “Sign up” at the top-right
- You can sign-up on Canva with 3 different options, choose an option that suits your needs, this won’t take much of your time.
- Sign up with Google
- Sign up with Facebook
- Sign up with Email
- Once you have signed-up with your desired option, Canva will take a minute to verify your details and you will be redirected towards your workspace on Cavna which will look similar to the screenshot below.
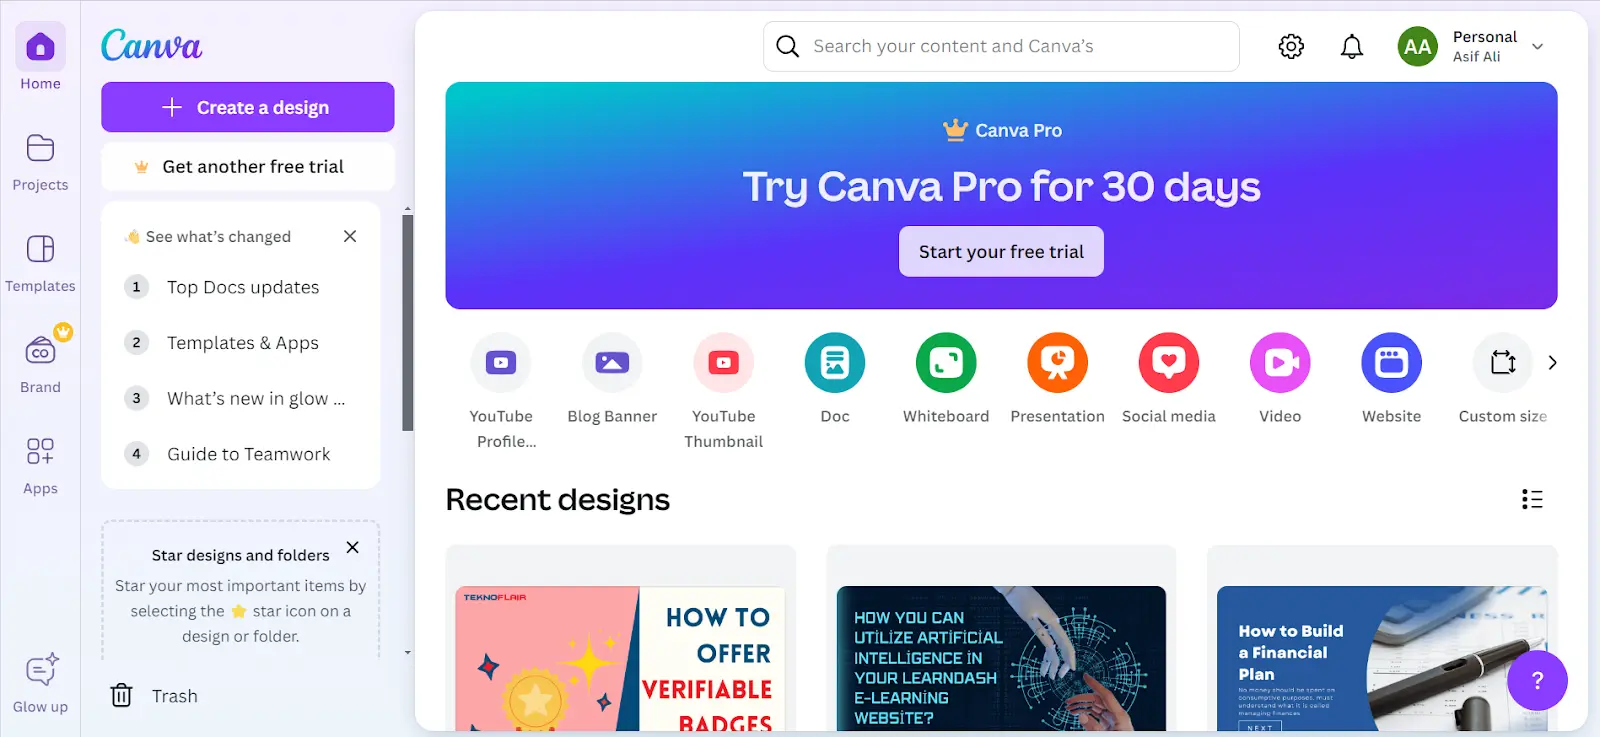
Note: Signing up on Canva is free and you can use various free templates to create a beautiful design, however, if you are interested in creating advanced designs for your certificates you can try their pro feature which also has a free-trial.
Step#2 Choosing a Certificate Template
Once you’re inside the Canva workspace, you’ll be greeted with a variety of options that might feel a bit overwhelming. To streamline the process, simply head over to the search bar at the top and type in “certificates.” This will bring up a wide selection of pre-designed certificate templates that you can choose from.
You can select a template that best fits your brand’s identity, and don’t worry if it’s not perfect yet—you’ll have plenty of customization options later.
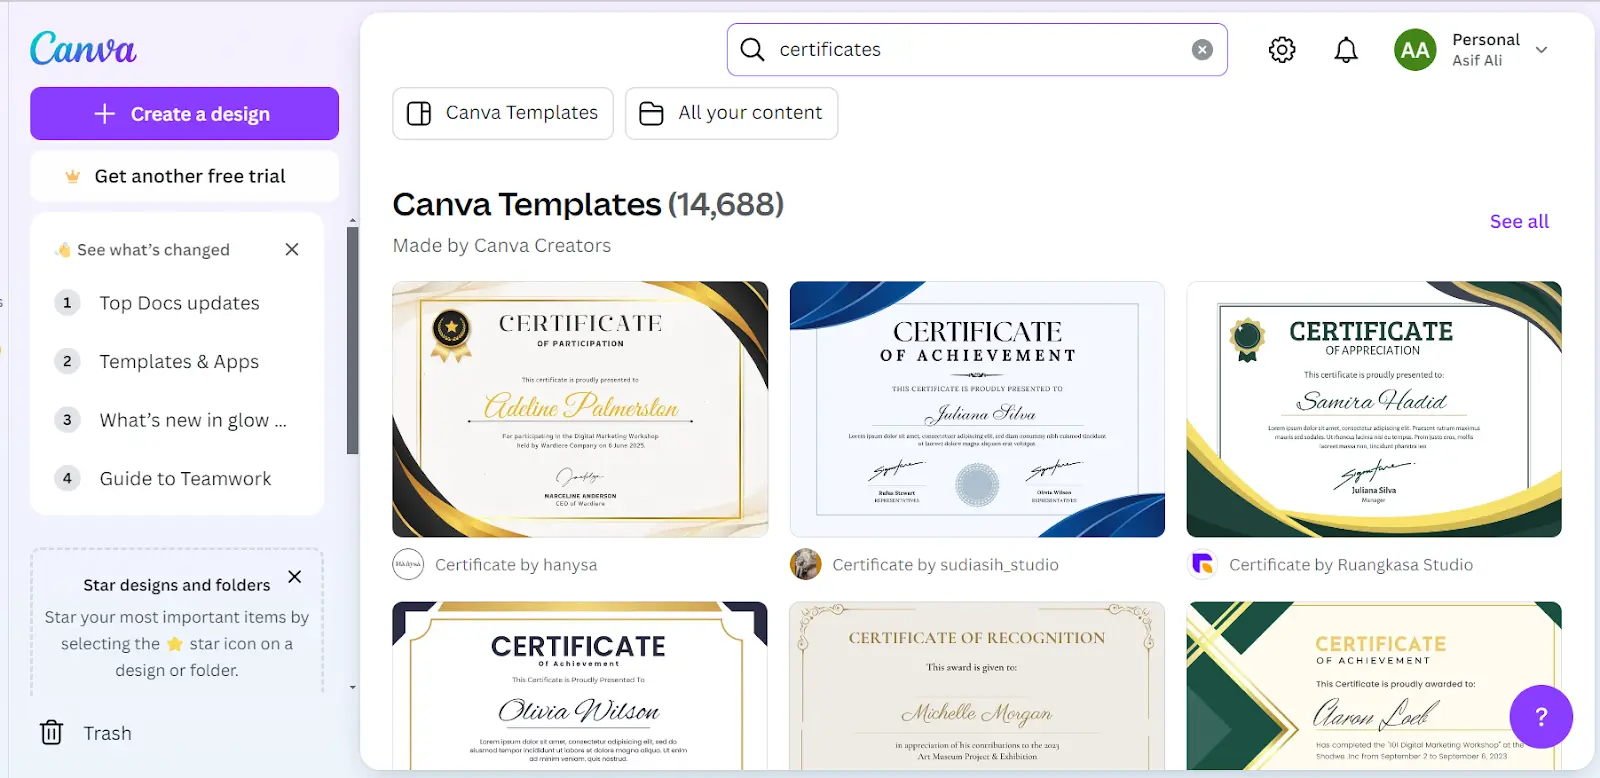
But before you choose a template for your LearnDash certificate, keep these points in your mind.
- Your focus should be on simplicity. When Canva provides you a list of templates, you should refine it with filters to find a professional looking certificate for your LearnDash course.
- Ensure that your template is easily customizable. You cannot customize every template as per your needs because these templates are pre-designed and if you need to have major customization, choose the one that you can easily adjust as per your needs.
- Think about your students. Afterall, they will get this accolade, so you have to design it by keeping them in mind so that it looks professional and gives a sense of achievement to your students.
Note: If you have knowledge of graphic designing, you have the flexibility to build your template from scratch on Canva.
Step#3 Customizing the Template
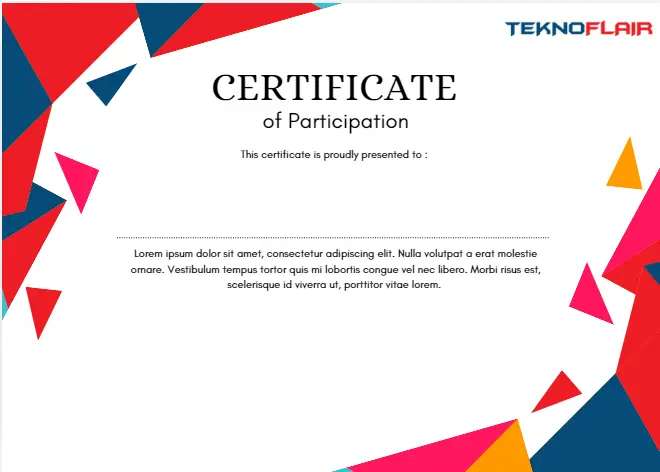
Now that you’ve chosen a certificate template, it’s time to customize it for your LearnDash course.
Keep in mind that the template might already be pre-filled with details such as the completion date, course title, and student name. These fields aren’t necessary for customization because you’ll want to create a dynamic certificate that automatically updates for each student upon course completion.
If you manually personalize each certificate, you’ll end up wasting valuable time. Instead, focus on adding essential brand elements like your logo, colors, and fonts to ensure the certificate aligns with your brand identity. Make sure to remove any unnecessary fields that don’t need to be hard-coded into the template.
In the end, your certificate will be ready to dynamically generate and award to every student with a cohesive and professional design.
Design Tips:
- Choosing Fonts: Stick to two or three fonts maximum. Use a bold or decorative font for the course title, and a more straightforward font for other text fields like student names and the date.
- Image Quality: Ensure any logos or images you upload are high-quality to avoid pixelation. A blurry logo can detract from the professionalism of the certificate.
- Balance and White Space: Avoid overcrowding the certificate. Use white space effectively to keep the design clean and easy to read.
By following these steps and design best practices, you’ll have a polished, professional certificate that not only looks great but also reflects your course’s value and brand identity.
Once you’ve created your dynamic course certificate, it’s time to download it and prepare it for upload to your LearnDash course. To ensure compatibility and optimal performance, make sure to follow the guidelines provided in the LearnDash documentation.
Here are the key guidelines from LearnDash:
- File Format: Use .jpg images only.
- File Size: Your certificate image should be no more than 1MB in size to keep loading times fast.
- Print Quality: To ensure the certificate looks great when printed, use a resolution of 300 dpi.
Following these guidelines will ensure your certificate is both web-optimized and ready for students to print if needed.
Integrating the Canva-Designed Certificate with LearnDash
Now that you’ve designed your certificate using Canva, it’s time to integrate it with LearnDash to ensure that it automatically generates for students who successfully complete your course.
Step #1: Upload the Certificate to LearnDash
To upload the certificate into LearnDash, follow these steps:
- Log in to your WordPress Dashboard.
- In the left-hand menu, hover over LearnDash LMS and click Certificates.
- Click Add New to create a new certificate.
- Add a title for your certificate that matches your course. For instance, “Completion Certificate for [Course Name]”.
Note: The classic content editor doesn’t have much functionalities, make sure that you have LearnDash Certificate Builder add-on Installed.
- Click on “Use Certificate Builder”:
You will be redirected to a block editor with more functionalities and flexibility.

- Upload the Canva-designed certificate background:
Once in the editor, you will be prompted to upload a certificate background. Upload the file you created with Canva.

- Keep customization minimal for efficiency:
While there are endless functions to explore, focus only on customizing the elements you need to create a sample certificate. - Add dynamic fields for user information:
- Search for the block named “LearnDash user meta” and select it.
- You may initially see the user ID (e.g., “admin001”), but we want to display the user’s first and last name.
- On the right-side panel of the block, find the “Field” option, drag and drop it, and select “User First Name and Last Name.”

- Adjust alignment using a spacer block:
- Aligning the user meta block with the certificate layout can be tricky as it doesn’t drag over the image.
- Add a “Spacer” block before the “LearnDash user meta” block to create an invisible block, allowing better alignment.
- Preview the certificate to ensure the alignment is correct.
- Add course information block:
- Add the “LearnDash courseinfo” block by dragging and dropping it where needed.
- For alignment, add another spacer block before it.
- On the right-side panel of the block, open the field dropdown and select “Course Info.”
- Add course completion date:
- To add the completion date, insert another spacer block and use the “LearnDash courseinfo” block again.
- In the field dropdown on the right-side panel, select “Completion Date.”
- Preview and finalize:
After completing these steps, preview the certificate to ensure everything is aligned correctly.
And that’s how you create a certificate on LearnDash!
Step #2: Assign the Certificate to a Course
With the certificate uploaded, you now need to assign it to the specific LearnDash course. Here’s how you can do that:
- From the WordPress dashboard, go to LearnDash LMS > Courses.
- Select the course to which you want to assign the certificate.
- Go to the Settings Tab.
- Scroll down until you see the certificate options.
- From the dropdown menu, select the certificate that you have just created.
- Save your course.
Once this is done, your certificate will automatically be awarded to students who complete the course.
Step #4: Test Your Certificate Integration
Before launching your course, it’s important to test the certificate to ensure everything is working smoothly.
- Navigate to your LearnDash course as a test student.
- Complete the course.
- Check the certificate that’s generated at the end of the course to ensure that it displays correctly.
Make sure that the certificate’s design is sharp, the dynamic fields are populated, and it aligns well with your branding. Here are the final results of how our certificate looks like.

Also, you can test the certificate as an Admin from the backend, here’s how you can do it:
Navigate to the User Edit Page:
- Go to Users in the WordPress admin panel.
- Find the student who has completed the course and click Edit.
Access Course Info for Testing:
- Scroll down to the Course Info section on the user edit page.
- Here, you can review the student’s course completion certificate.
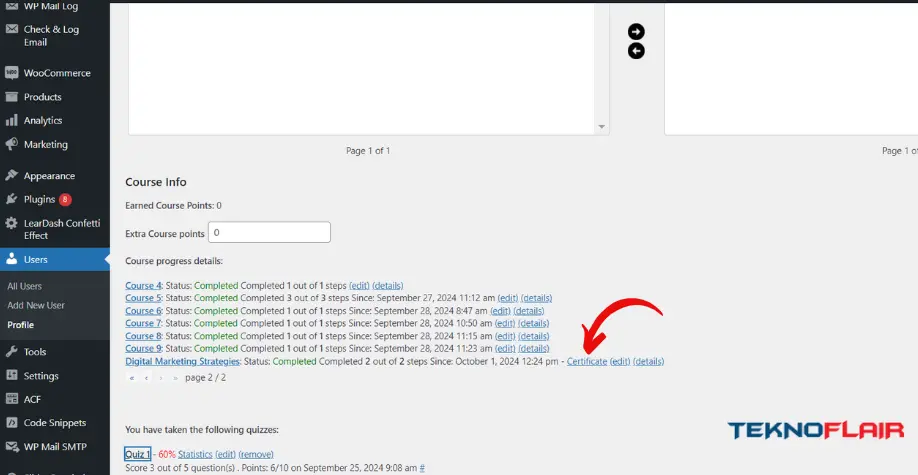
Note: Some websites have image optimizers to optimize SEO performance. However, these optimizers can distort the pixels of your certificate. To avoid this, ensure you have skipped optimization for the certificate picture.
Tips for Maximizing the Impact of Your Certificates
- Promote Early:
- Mention the certificate in course descriptions and introductions.
- Highlight its importance during key milestones.
- Encourage Social Sharing:
- Create a unique hashtag for students to use when sharing.
- Provide shareable graphics for social media posts.
- Showcase Achievements:
- Dedicate a webpage to display student certificates.
- Feature a “Student of the Month” to recognize outstanding achievements.
- Solicit Feedback:
- Use surveys or feedback forms to gather student insights.
- Request testimonials for promotional use.
- Utilize for Upselling:
- Send follow-up emails with links to advanced courses.
- Offer discounts on future courses for certificate earners.
Check out LearnDash add-ons for better customization
Conclusion
Setting up a Canva-design certificate in LearnDash is a straightforward yet impactful way to enhance your course offerings.
By investing time in creating a unique certificate, you not only reinforce your brand identity but also motivate students to complete their courses. A well-designed certificate serves as a tangible reward, boosting both student satisfaction and trust in your brand.
As we’ve explored, integrating a Canva certificate involves simple steps: creating a professional design, uploading it to LearnDash, and ensuring it is dynamically generated for each student.
Additionally, promoting these certificates effectively can further elevate your brand and encourage student engagement.
In a competitive online learning environment, standing out is crucial. Customizing your course certificates with Canva is a one-time effort that pays dividends by enhancing your credibility and distinguishing your courses from the rest.
Start creating your Canva-designed certificate today and watch how it enhances the overall experience for your students!
Do you need powerful LMS? Get LearnDash plugin here.
FAQs
How do I add a certificate to LearnDash using Canva?
To add a Canva-designed certificate to LearnDash, first, design your certificate in Canva and download it in PNG, JPG, or PDF format. Then, go to the LearnDash admin panel, navigate to the course you want to add the certificate to, and access the “Certificates” settings. Here, you can upload your Canva-designed certificate file. Ensure that your certificate design meets LearnDash’s dimensions for proper display.
How do I preview a LearnDash certificate before publishing?
You can preview your LearnDash certificate by going to the “Certificates” section in your course settings. Here, you will see an option to preview your certificate design. It’s important to check that the design appears correctly with the dynamic tags for student names, course names, and completion dates, ensuring the certificate looks as expected before it’s made available to your learners.
How do you design a certificate in Canva for LearnDash?
To design a certificate in Canva for LearnDash, start by selecting a certificate template or creating one from scratch. Customize the certificate with branding elements, such as logos and colors, and add placeholders for dynamic information like the student’s name, course title, and completion date. Once satisfied with the design, download the certificate in a format compatible with LearnDash (such as PNG or PDF) and upload it to your course’s certificate settings.
What are LearnDash certificate shortcodes?
LearnDash certificate shortcodes are dynamic tags that allow you to insert personalized student data into certificates. For example, you can use shortcodes to display the student’s name, course title, completion date, and more. These shortcodes are automatically replaced with the corresponding information when the certificate is generated.
Bring Your E-Learning Vision to Life with TeknoFlair
At TeknoFlair, we specialize in helping educators and businesses elevate their LearnDash-powered e-learning platforms.
Whether you’re designing certificates with Canva, creating interactive course modules, or customizing unique user experiences, our WordPress development expertise ensures seamless integration and functionality.
Ready to make your LearnDash site stand out?
Let TeknoFlair handle the technical details while you focus on creating impactful learning experiences.
